Thursday, September 4, 2008

The Future - arriving at the past. .2.. Sowing carrots and other root crops

This blog is really about a method my Father taught me about sowing carrots Every time I sow this way he is there with me in my thoughts and heart so in a sense he lives on in every crop I sow. This blog then is really from him to you. My part has been to take a little time to take photos to illustrate the steps and of course write what he taught me. So enjoy the fruits of his experience.


Carrots are an easy crop to grow. In the colder regions they are sown from early spring until early summer, in succession. Where I live I can grow them all year round and so, I sow a few meters of seeds every two months in succession to enjoy a continual supply throughout the year. I think it always worth pushing the boundaries too when you plant – what does it matter if you lose a crop to frost when you find out for sure where your boundaries are with when to sow.

 
For my winter soups I also grow parsnips and use this same method of sowing. With root crops such as these the looser the soil the better although they will grow successfully in clay soils. Looser and sandier soils mean the tap root can reach deep into the soil looking for moisture creating good long fleshy carrots. This means that drainage is good so that the roots will not rot in excessive moisture in areas of prolonged rain periods. The drawback of loose soil is leaching of nutrients, but with carrots their tap root reaches deep into the soil. Also, remember that the nutrients are brought back to the surface and stored in their foliage so composting or leaving them to rot on the surface when you harvest them will re-cycle these stored nutrients to the surface again. I personally feed the tops to the rabbits and recycle them this way.
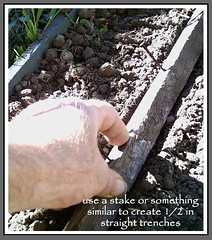
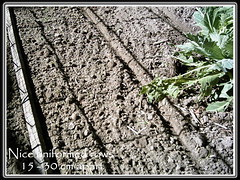


First of all it is worth digging the soil to spade depth and a bit more and remove any stones or other objects that will impede growth, causing forked or miss-shaped roots. This includes fresh manures. You need now make 1 cm or 1/2 inch deep trenches in the soil surface using tomato stakes or something similar in rows about 6 – 12 inch or  15 - 30cm apart, depending on the variety.
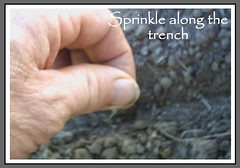
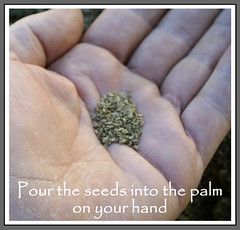
 

Pour the seed into the palm of your hand and then, pinching some of the seeds between your fore-finger and thumb, sprinkle the seeds lightly along the rows. Please note here that some gardeners mix sand with the seeds to ensure they are sown thinly. Some mix other seeds like radishes together with the carrot seeds so that, as the carrots develop, they can be feasting on the fast growing radishes while creating a more natural, and easier, method of thinning that the carrots unfortunately require. Unfortunate because thinning can be a bit time consuming, but well worth the effort. Once sown cover the seeds (1cm, 1/2 in) and firm the soil with the hand. Another practice I often employ is to grow fast growing crops between the rows such as lettuces radishes, bok choy ..etc and harvest when ready or overgrown by the root crops foliage.


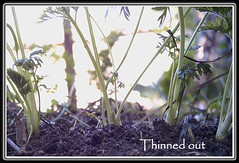
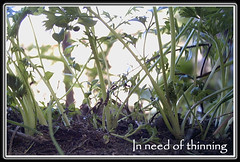
Seedlings emerge in 7 – 10 days and once about 1 – 2 inches high, or when you intuitively feel it is time to do the first thinning, grab some scissors and thin away. You will notice in the photos that the seedlings can grow close to each other and need to be thinned so the roots can grow without being impeded by other seedlings growing too close. To pull the seedlings out, at this stage, will damage the stronger seedling that you choose to leave growing in the soil - so I suggest you use scissors as per the photo. Note here too you must get rid of any weeds that sprout around your seedlings so they do not interfere with their growth or fight for sun and nutrients. I thin out over at least three stages. Your intuition will tell you how far apart to thin the seedlings and which are the healthier to leave to grow. The first times you will make mistakes but after a few successive crops you will be an expert – no doubt!!!


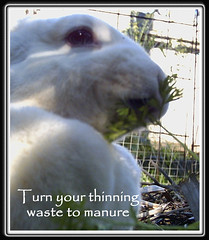
The second, third, fourth and fifth thinning, which I warn can be a pain in the back and requires much patence (if you are like the impatient me), will be your first harvest for the table salad. The slender slightly fleshy roots can be added to the salad for a little extra taste and colour and the rabbits love any fresh seedling tops you can feed them. They in turn, gladly, leave deposits of recycled garden waste for you to collect and introduce to the garden as manure.  Also remember each thinning produce larger roots and eventually you can add them to the pot.
 

Note too the baby carrots are ready after 10 weeks so carrots are, in this light, perfect to grow for the table. Growing them in succession every 8 – 10 weeks in rows of about 3m or 3 yards is about right but after a few crops you will figure what is the right amount to grow each time and how often to suit your personal needs.


Other things to think about are things like light mulches, to keep weeds down that can impair the shape and growth of the root. They too use the nutrients and water. Do not over water otherwise the roots can get lazy and not lengthen to produce long carrots but on the other hand – remember that in the hotter months, that lack of water will dry out the root and they do not taste as nice. Rotation of crops is important – never grow carrots or any plant for that matter in the same spots in successive crops – this I will cover in another blog – so please trust me for now (wink). There are other localised problems to do with carrot flies and such so I advise you source books from the library or talk with other gardeners in your street. Once you start to garden you will find there are many others who not only enjoy gardening but readily share experiences and seeds.
 

Another great use for the foliage is to use it as a green backdrop in flower arrangements in the home or my favourite is to use as a garnish to improve the look of your family meals. It not only looks great but makes it taste better because of the joy of seeing such beauty on the plate – tastes come from the mind as much as the taste buds – believe me!


So before I finish I want to give you links to two other great blogs on gardening that my online friends Jeremy and Amy have produced. I am thinking here to perhaps start a group blog on gardening so we can share and grow together healthy gardens, bodies, minds and spirits let me know what you think.

Please look below to the links to the other sites on gardening as metioned above


this is the link to Amy's site http://amyukalichick.multiply.com/journal/item/98/Let_the_birds_and_insects_do_it.


and Jeremy's - http://sotuis.multiply.com/journal/item/74


The Future - arriving at the past. .1. Introduction to Natural Gardening

In my garden, my focus is almost totally on the soil. Natural gardening is about improving the soil, which in nature is a living, bio-diverse medium, full of micro organisms, worms, grubs and a perfect balance of moisture and food (ie manures composts organic matter) to sustain and maintain a healthy soil. This in turn produces healthy plants, which thrive in the environment you co-create with nature. Use of long term artificial chemicals, produce only short term gains, whereas in nature it is totally sustainable. Modern techniques are dependant on external energies such as fertilisers and pesticides which tend to attack nature rather than working with it. The soil, in this approach, is first mined of its fertility to produce food and, from then on, there is a dependency to use non renewable resources to support further yields which is not only costly, but is slowly killing our soils. This is to the benefit of the multinational companies who fool you into a false sense of security only for their gain and their shareholders.


Working with nature, using organic, permaculture or natural techniques, takes into consideration all the cultures of the immediate environment of your garden – buildings, trees, animals, plants, water, sun, wind, people, insects, rodents, birds, plants, stones ….etc  and looks into their inter-relatedness. This is working with nature in preference to being against it, finding ways these cultures can work or function co-operatively rather than seeing them as separate individual functions. I believe too that  a vital asset to your garden is your intuition. This I see as nature itself speaking to your heart through the intimate relationship you build with it through your garden.


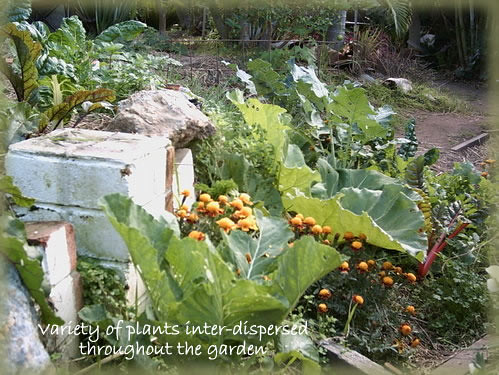
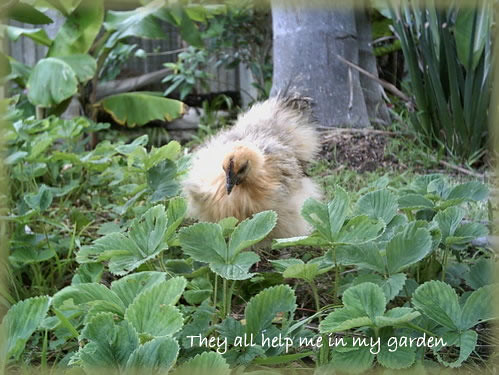
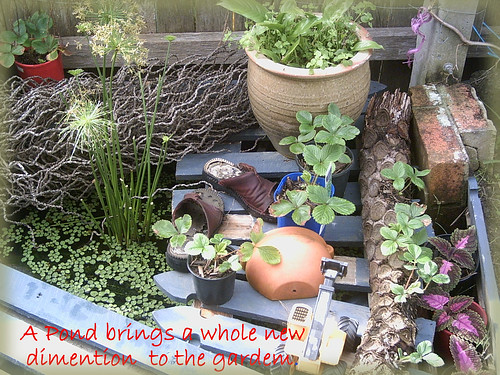
Crop rotation helps the health of your garden as does the inter-dispersion of flowers throughout the garden to  attract bees. The use of compatible herbs and companion planting attract other insects and organisms, or repel those you do not want. I create environments within the garden, such as little nooks and crannies, to attract creatures like lizards and rodents to keep the population of things like snails in check. I have made a fish pond in the vegetable garden to encourage frogs to feed on insects that if over populated may decimate my crops. I keep Rabbits and chickens for manure and the straw I buy for their homes make great mulch which help to control weeds and maintain a good moisture level in the soil in summer while breaking down to improve the soil with their uric acids and nutrients.


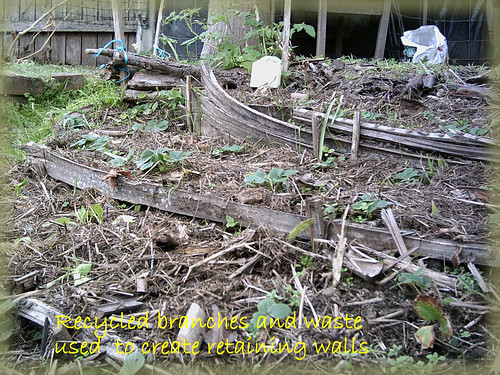
Recycling kitchen and garden waste in composts and using those pruned branches to create little retaining walls or place them in soil to impede the movement of the topsoils on inclines – they too over time break down leaving the nutrients and fibres needed to improve the condition of soil - plus of course help the world environment by not sending such things off to Land fill rubbish dumps. My garden soil is a seed bank too. I allow my strongest vegetables to go to seed instead of eating them. The seeds drop into the soil and appear as seedlings, in season, where the seeds lay. Some end up deep in the soil if I happen to dig the garden over and maybe a year or so later when I re dig they just pop up here and there. The seeds produced, genetically change over time and adapt over generations to the environment of my garden and build resistance to whatever detriments may be peculiar to my garden. Packet seeds from seed companies are adapted to other environments.


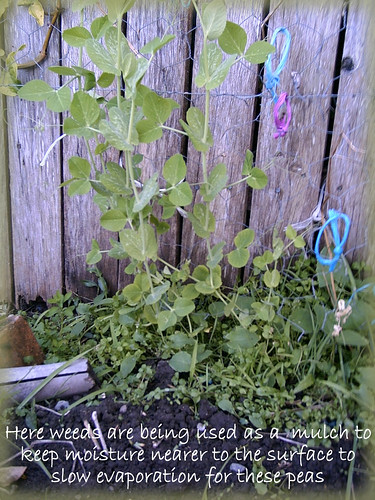
Weeds are also beneficial and not at all the scourge they are made out to be. I can use them as a sort of mulch to prevent evaporation in summer or as a way to recycle any nutrients that leech deep into the soil, unused. These are then captured by weeds with deep, penetrating tap roots, bringing the unused nutrients back up to their leaves and stems. So by lopping them before they seed I leave them to rot on the surface so the nutrients are then re-introduced to the topsoil. These are just some method ideas I use in my garden and over time I will devote blogs to each method independently. I will use and expand the concepts in photos and simple explanations to encourage you to start thinking and seeing how easy and enjoyable it is to grow your own. Even more so, that perhaps one day what I share here with you may help you through tough times in the future. For those of you who I know already use similar philosophies I hope you join in and co-blog or write your own experiences on subjects particular to your environment or focus


You often hear that organically produced fruits and vegetables are small, less appealing and less bountiful as a crop. This may be so to a degree but believe me they are healthier and safer for you, your family and the environment that we need to reclaim if this planet and us on it are to survive. The future is in our hands and we sure need to re-visit the past to ensure there is gonna be a future.

Wednesday, September 3, 2008

Too Easy

About one Year,im back in Germany and after 13 years of living in Brazil,i have become very lazy(Okay,not to much)I have learnt,how to make the best,without putting to much Effort.
When i went to the Supermarket and i saw the Quality and the Prices of Vegetables,i decited, to grow them myself again.There is nothing better.
There was only one Problem.We have a lot of Land,enough,to plant more,as we can eat.But it is all Grassland and to turn it into Vegetablegarden,its a real Trip.
So,last Fall,i started,to dig the Ground and pick out,Millions of terrible Roots,of Plants,that grow faster,then everything else.Leaving just a little piece of those Roots,they will come back,quicker as you can look.
This Year,when i was fed up with diggin, i had a Idea,how to prepare the Garden,without breaking my Back.
We have 3 Horses and they make a lot of Sh..! So,i took all this beautyfull Material and spread it out,allover the Piece of Land,that i decited,to be the future Vegetablegarden.
I put it about 30 to 40 cm thick over the Grassland,to kill the wheat and at the same time fertilize it.
In the Spring,i planted the Land,that i had prepared last Year and all Plants grew very good.
But im not satisfied,i wanted more.
So,i made the Experiment and planted Botatos,Tomatos,Beans and a lot of different things,directly into the (Sorry) fresh Horseshit,that i have spread out before.
You cannot imagine the result.
From some of the Botatoplants,i get more then 5 kg each Plant and everything else,i could watch it growing.
Some of the last Botatos,i planted,i just threw on top of the Horseshit,little botatos,where i did not think,that they will grow at all.I covered them,with the same Material and i was amazed of the outcome.Just a simple Botato,was so big,that just one of them was enough,to fill my Stomach.And such a taste.
Okay,there are many Plants,who dont like,if the Dung is to young,but i know,how i will prepare the Garden next year.

Tuesday, September 2, 2008

ANOTHER POND STORY- by Mia

Hello all Garden Gurus!

After having read Keith's great description of his garden and pond, I thought it might be of interest to tell how my partner Kevin built our pond.

The story actually started with Kevin having sold his house which had a tiny little pond with goldfish in it. We really wanted to bring some of the goldfish over, but of course had no where to put them here at my house. I think I had a chat with Keith about it and he just suggested building a pond. We decided that would be quite a good idea, after a bit of thinking. 

Here below is a pic of the fishies in transit lol (pic 1)


My front yard had a little garden bed in it with a rectangle made when the concrete was poured, so we thought of putting the pond there, as we absolutely didn't want to hack a hole in the aggregated concrete. The garden bed was no loss as it only housed a huge spiky succulent that I don't know the name of and a tired Hibiscus. So Kevin started digging those out.

Then Kevin built a box frame of treated pine timber which was larger than the hole in the ground. (See pic 2)

                                 Then he lined the edges of the concrete hole with some thick rubber matting. And created a smooth base in the bottom of the hole with sand. (Pic 3)
After that he laid in the pond liner which  was secured to the walls of the frame above the water level with some flat head nails.  (Pic 4)


Then the box frame was capped with dressed pine that was strong enough to sit on and the corners were bevelled to create a neat look. (Pic 5)


Kevin also put in two Water Lily plants and some other aquatic plants and we also added a pump with a little fountain. (See Pics 5 and 6). Gradually we added other plants to put on the edges and round the yard until we had a really lovely outdoor area, and it all started with the pond!
                           Pic 6

As many of my Photographer friends know, I have taken many pictures of this pond and it's inhabitants and the pond makes a world of difference to the feeling and ambience of our little front yard.

I hope you all enjoyed this story and please come back to me if you have any questions.

Blessings
Mia

Just us - a flower in the mist


We found this delightful flower growing wild in the hills of Dunagiri (Kumaon, India). Internet tells me its also known as the 'falling star'...
wish we could catch it and put it in our pocket so it never fades away :)

ITZDAPAPPARAZI's GaRdEn

My garden is quite large but a lot of it kind of takes care of itself. The weather has been unkind for a long time lately, and last weekend was the first time in a long time I have been able to start getting it back to looking like it is cared for. I tend to like the jungle look though. I am situated in the south west of the North Island of New Zealand. Weather is not that extreme. Frosts in winter sometimes, summers can be dry but not scorching. Most the time the garden is not too badly affected by climate.

A lot of my garden is easy care, a large part of it is planted in native trees. These dip down a bank and then there is a row of pines at the back which is the boundary between garden and paddock. It is fairly well established now and does not require much care, every so often I zip around with the weed-eater. In the beginning it was a lot of work nurturing the seedlings and baby trees. Alot of it came down to survival of the fittest and trying again. The natives attract a few species of native birds, such as tuis, wood pigeons and fantails. The work was all well worth it just to see the bird life and seasonal changes in the trees.

Fantails are pretty cute, they flit around after you looking in disturbed ground for insects etc to eat. I was lucky to get this photo. Usually they dance around in the air and dont stay still for long at all.


this is the native area

If you are interested in attracting birds to your garden there are books and websites about what you can do to lure them in. One simple idea I just read is this. Find some pine cones which are open and attach string so you can hang it from a tree. Smear a mixture of peanut butter and rolled oats in the open parts of the cone. It should attract small birds such as waxeyes. (I don't think the bird population here has discovered my cones yet! )


Other parts of the garden are shown here. A row of camelias are a break from lawn to paddock at one part. Along one fence is a salvia hedge, I just cut it back 2 weeks ago. It needs to be cut back to almost ground level every year because it is such a rapid and rampant grower. But mid spring and all of summer it is lovely with masses of cornflower blue colour flowers. It attracts lots of bees. Apparently there is a world shortage of bees so do plant anything that will attract bees. I do not know how true this is..but I heard that if there were no bees, then the human race would die off in 4 years. Every species co-exists.

The white thing there is my cat, he is deaf. I can mow around him while he sleeps.


The old shed is where the fire wood and junk is. There is a pale pink old-fashioned rambling rose that climbs over the shed and in summer it is in full bloom and looks lovely. And then of course there is the compost and worm area, the worm farm under the blue plastic cover is new and there is another blog about making that. I do have a vegetable garden too, but that is such an embarrassing mess I decided not to include that here. The vege garden is my NEXT project. The soil here dries out quickly as it is close to the river. It can be good in that it drains quickly when there is a lot of rain, like we have just had. But in summer it gets very dry. I try not to water too much because some plants can adapt to dryness if you do not baby them too much. I water when plants look like death.


Open Garden Tour - Keith's - East Coast of NSW Australia

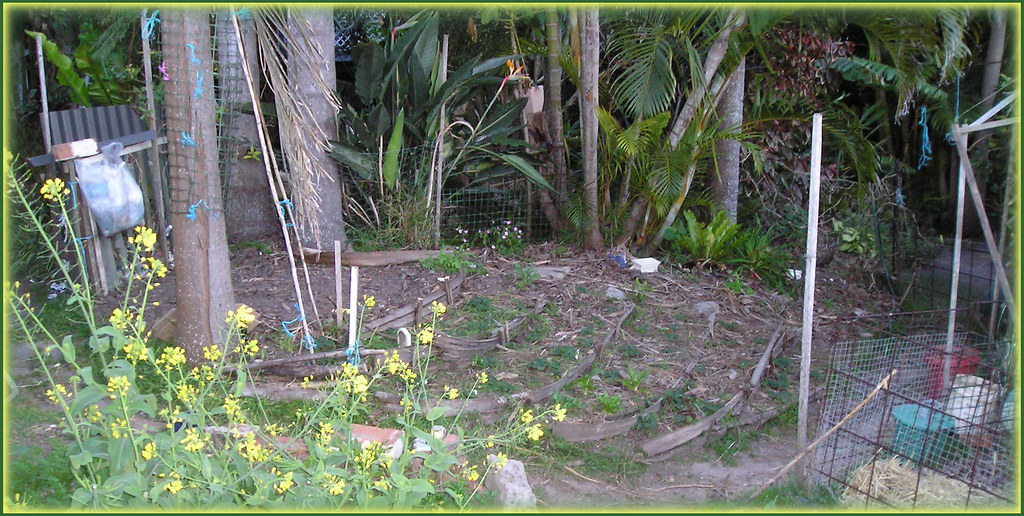
Every garden is unique, each with its own set of conditions creating all sorts of unique consequences. Mine sure has its own, making it interesting to work with.  There are two conditions that stand out creating a bit of a challenge - sun and light! The small piece of garden I rescued from the surrounding tropical garden with its tall palms and lush, dense vegitation is facing SE to about NE and as such is really borderline so far as the minimum amount of sunlight needed to produce food

You can see by the above photo that the rich tropical vegetation builds an impressive barrier preventing much of the sun from penetrating through to the garden once the sun is past the northerly point during the day. The strawberry patch you see here is not good for growing anything over winter because the sun is lower in the sky and the garden shed shades it too much. However back under the overhanging palms I can grow summer crops over the autumn, winter and spring ( lettuces, zucchini, sweet potato, tomatoes etc) because that area of the garden the plants are tricked into thinking  it is actually spring, summer and autumn. From the summer solstice onward the sun reaches far back in the garden and as the summer approaches that part of the garden gets less sunlight each day as the sun moves back toward the south, so to speak, so the plants think it is coming on to Autumn and start to mature or head up.


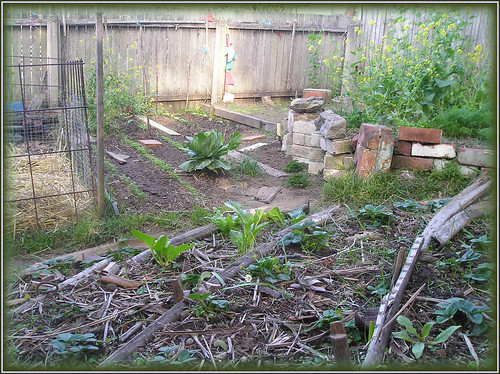
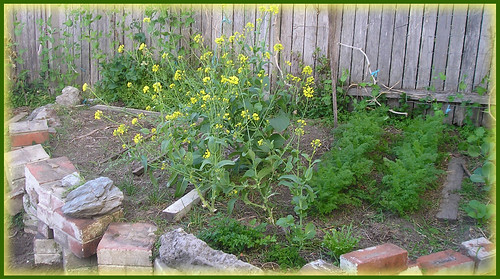
In the next photo the retaining walls of the strawberries in the foreground and main garden beds all face the North East. The fences run North/South and East/West so you can imagine the direct sun is very limited. For you Gurus in the northern hemisphere this is the same as a garden facing South east. Basically I get the early sun till about midday or a bit earlier and this combined with having a small area to grow means I have to grow things intensively. I do not have the luxury of room to have small beds with wide paths to make access to the plants easy or push wheelbarrows about. Those bricks and bits of wood are my paths - I even utilise that rickety retaining wall as a path. I have to balance my way around on these carrying whatever or balancing as I tend to the plants.


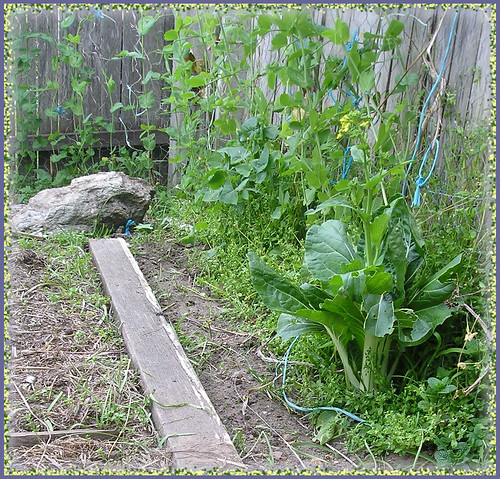
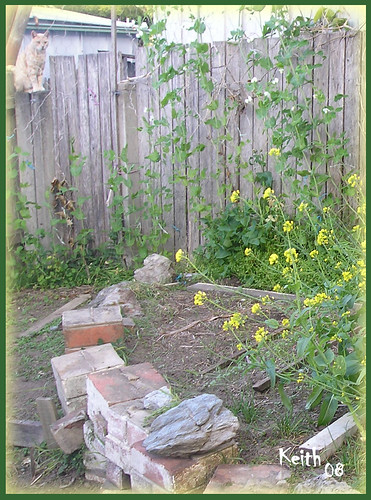
Anyway here are some other photos for you to see what I have in the small area dedicated to the vegetables. The first one is to show you how I garden intensely. notice the small area between the wooden path and the fence line which has peas growing up it. What I have done is planted some bean seeds there on the open soil which will grow to about half a meter more or less and produce beans. The peas behind do not produce flowers and peas till they are about 1 meter high and also the bean plants will not block their sun nor interfere with harvesting. Note too the bk Choy plant which is now in flower - this I will leave in the soil to collect seeds while harvesting the beans and peas. So in such a small area - so much is happening and as long as they have enough water and food they are happy and produce healthy produce.


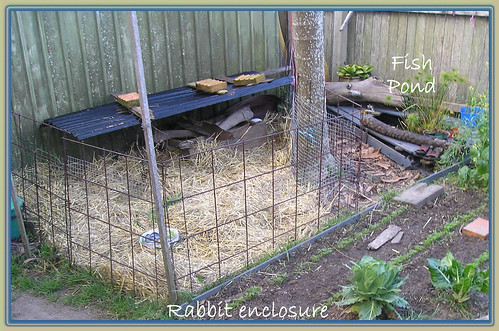
See too how the cat enjoys overlooking the garden and that chook (chicken) sneaks in from time to time to pick at the fresh vegetables and visit the bunnies. In this photo you see my composts that I have built - there is actually two there and a third is in the shaded part of the photo - each at a different stage of composting. The other photo is the bunny enclosure - the manure producer for the garden. every now and then I collect up the straw from the cage and use as a mulch for the garden. it is full of urea and manure so perfect for fertilization of the garden as well as a mulch to keep weeds down and moisture up to the plants. It is worth noting that with a good mulch the moisture stays at least 40% longer in the soil - in fact more depending on the depth of the mulch another great advantage to mulch while we are on the subject is that it stops soil
splattering on your crops when it rains and so needs less cleaning.


Anyway that's it for now - How about a look at all your gardens and its personality and needs - would love top see them all as I know you all would too
.

Monday, September 1, 2008

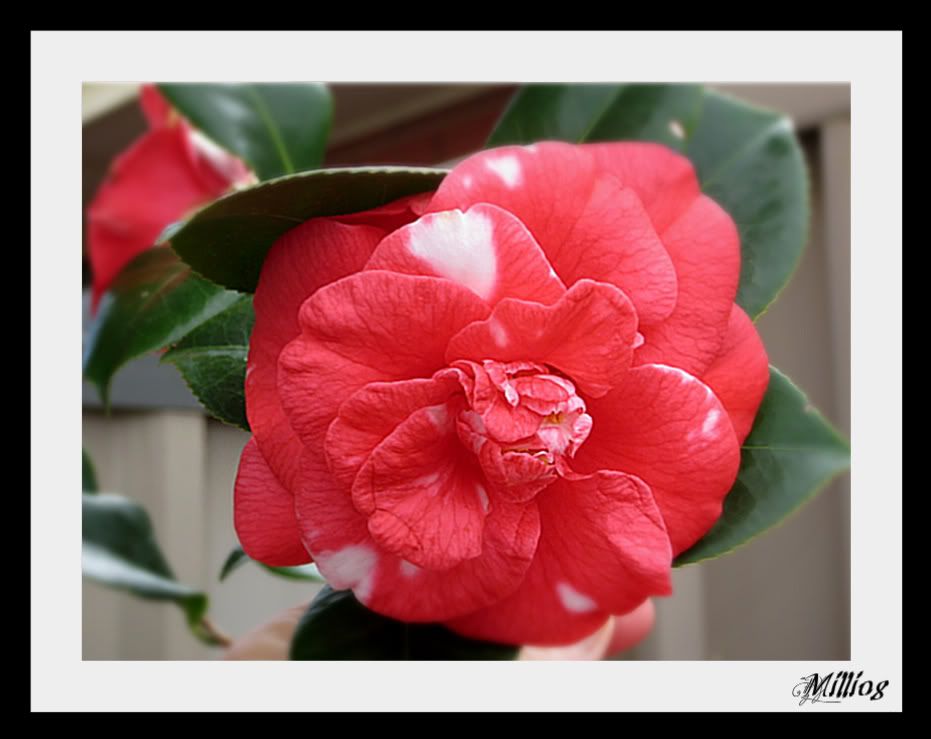
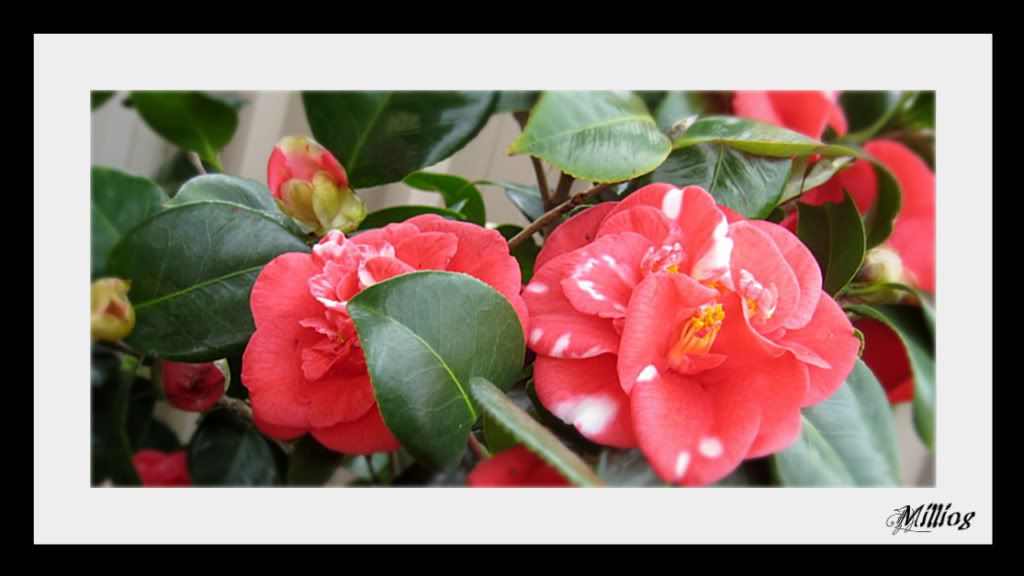
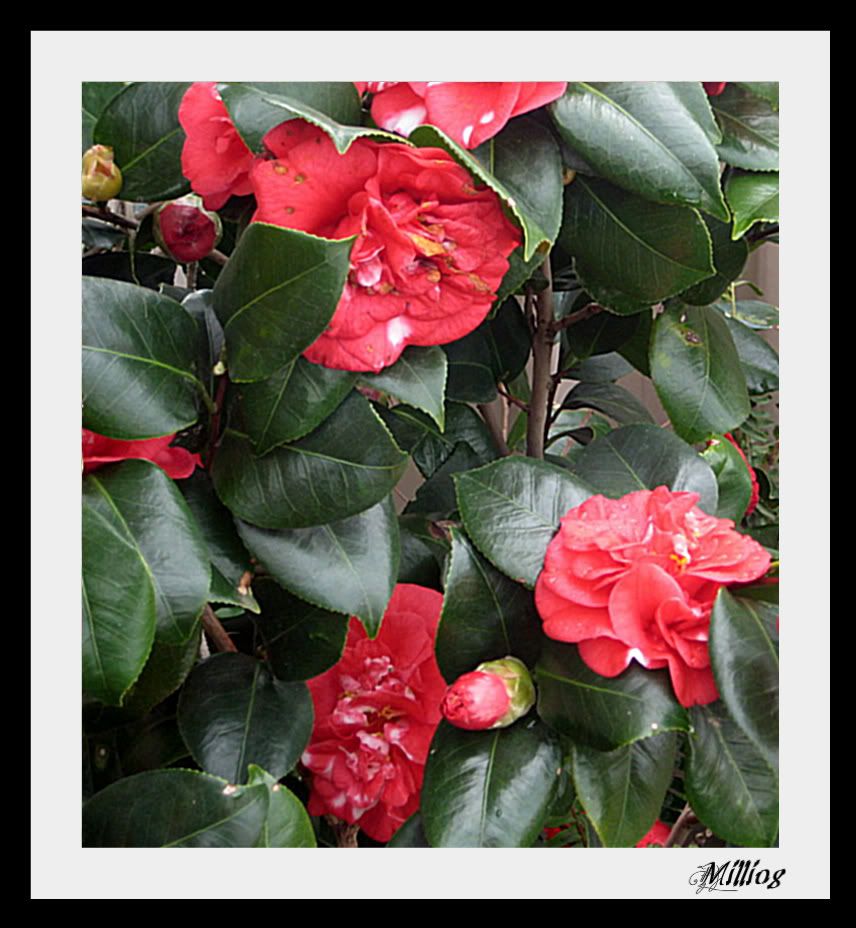
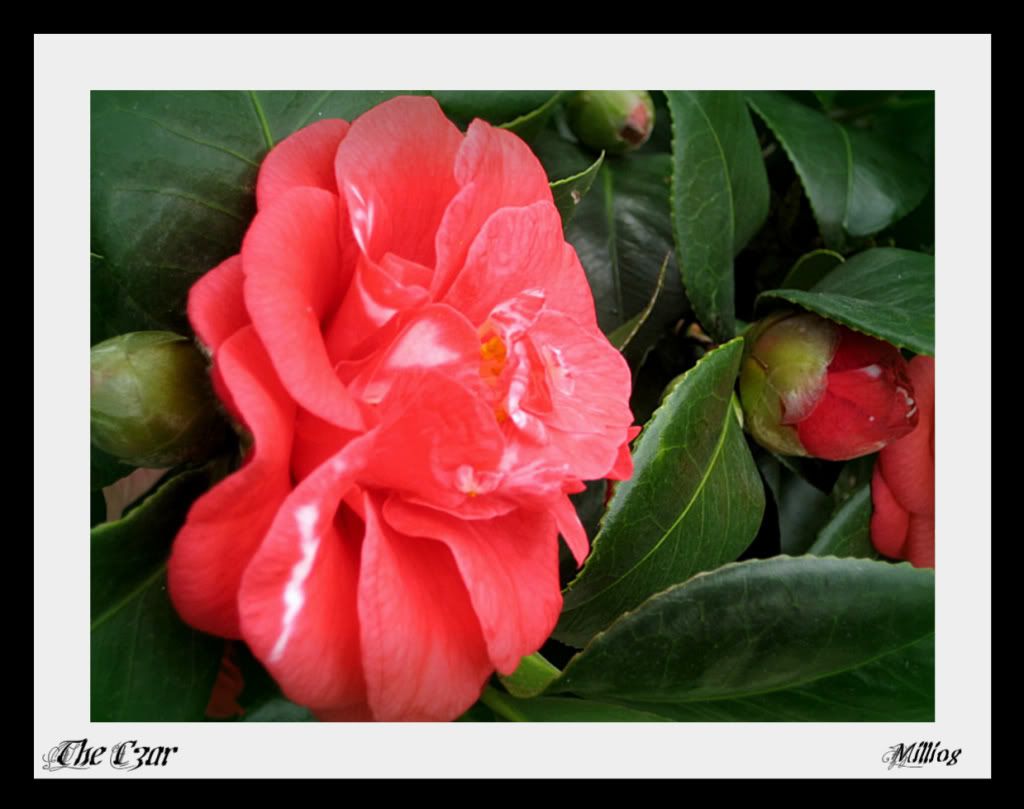
Mums Camellia: The Czar.

Camellia Japonica The Czar.

IMG_1657-1-1.jpg picture by millimum

It was officially the first day of spring here yesterday and even though the afternoon was a wet one and thankfully gave us more rain, today is a beautiful Spring day. Birds chirping under a blue sky and just a slight breeze. In the garden buds are appearing aplenty.


IMG_1655-1.jpg picture by millimum

I was visiting my mother and noticed her camellia was very much in flower a few weeks back , and so as I do I reached for  my little camera and took a few photos of the camellia as we chatted.

Mum has this beautiful 35 year old Camellia Japonica planted in an old washing machine drum and growing oh so well, for the upheavals of relocating to a few different locations over this thirty five year period. From hills to seaside it has successfully traversed in the big old tub and the fact that it is in a tub where maybe it is by now root bound has probably been it's saviour. Not that you would know that it has lived in different places because as you can see by the photos here it still looks pretty good. 

I love Camellias and this one called The Czar is quite striking with its dark green leaves and these big double flowers in a gorgeous crimson pink with streaks of white appearing over some of the petals.


IMG_1656-1.jpg picture by millimum


A little bit about the Camellia taken from the net:

The earliest recorded information of camellias coming to Australia is towards the end of 1786 when preparations were under way for fitting out the fleet that was to convey the first convicts to Australia. In Sir Joseph Banks list of plants and seeds to be transported to Australia were two tea plants. These were sent on the ship Sirius and came under Governor Phillips direct supervision. No account of the safe arrival of the tea plants or their subsequent cultivation in Sydney has so far been found.


In 1789 two more tea plants were sent aboard the ship Guardian but on Christmas eve the Guardian was lost at sea. When this news reached Britain the Gorgon was fitted out as a replacement. While lists of the plants and seeds sent on the Gorgon have not been traced, it has been assumed that they were the same list to those sent on the Guardian. Phillip Gidley King who returned to Australia on the Gorgon ship, wrote from Sydney in October 1791 that the fruit trees and other plants were all ina very good state on our arrival in Sydney.


While we do not know how successful these efforts by Banks to introduce C. sinensis were, we do know that it had been successfully established by 1796. in that year William Paterson, the soldier botanist friend of Banks who had lived in N.S.W. since 1791, returned to England. William discussed with Banks the plant requirements of the colony and Banks annotated his Guardian list, noting all the plants marked with a pencil tick,Col Paterson tells me are growing in the colony. Tea was one of the plants Banks ticked. So the first recorded camellias to be brought to Australia were C. sinensis in 1791. In 1798 two more tea plants were sent on the ship Porpoise under the care of George Sutter. Sutter bought 18 boxes containing plants. Box 14 contained 2 tea plants, 1 Averhoe, 3 Brucca and 1 Jalope plant.


George Sutter was given a land grant of 186 acres at Baulkam Hills which he names Chelsea Farm. George established the first orchard and nursery in Australia and in a few years was supplying Sydney with fruit particularly oranges and lemons. In 1843 George Sutter published a small book on grapes and oranges, and died May 5 1859.


Though these Camellia sinensis plants survived and lived for a while all of them eventually died.


The oldest tea plant growing in the Botanic Gardens Sydney was planted in 1828 and had been introduced from China in 1823 by John Reeves.
Charies Fraser reaches Sydney in 1816 as a Private in the 56th Regiment. Governor Macquarie placed him in charge of the garden of the government. that was to develop into the Sydney Botanic Gardens and in 1821 appointed him Colonial Botanist.

The following manuscript, Catalogue of Plants Cultivated in the Botanic Gardens Sydney was prepared by Charles Fraser, dated by him January 1828.

Link here to read more from this site

History of Camellias in Australia by John Fowler.


The Camellia surely is a beautiful flower although it does not do as well as a cut flower. It is best to sit the flower itself in a float bowl for the prettiest of results.

I hope that you have enjoyed The Czar and here is a last photo before the flowers yellow off and drop to the ground therein making a very pretty carpet across the earthen floor.


IMG_1658-1-1.jpg picture by millimum


Milli 2008


Sunday, August 31, 2008

Ponds in the vegetable patch

Well it was clean up time for my garden this week and part of it was to pull my pond apart and re-lay the facade  covering the pond. I thought it a perfect opportunity to show you all how easily and inexpensively it can be made.


Here you see the pond as it was,


This following photo is what the pond really looks like. It is just a depression made in the earth then lined with black builders polythene. For me I chose the platform style made up from old fence palings and laid out to form the look below. You can choose to landscape yours with soil, stone plants , pother's or whatever you like - the possibilities are endless. Please note that I have not used any nails or fasteners for easy dismantling of maintenance


The advantage to the pond is that it attracts other animals plus what I like is adding another element to the garden - the missing one -Water. Bit too out there for some but I think the idea of the four elements air fire water earth is part of the balance in gardens. Introducing things like frogs, insects, fish and water plants creates a new eco-culture in it's own environment and this in turn has an effect on the culture of the garden you are creating. Diversity is the key to balance and this in turn determines the levels of health.

Anyway hope this may interest someone out there