Sunday, September 28, 2008

Natures Palette.

Photo by Milli 08 cp.


Natures Palette

As I watch the clouds float gently by

 I am aware that I am viewing Natures palette in the sky

It is a canvas changing day by day

From Brilliant blue to darkened grey

Fluffy white cumulus clouds form over blue

As I watch new shapes come into view

Storm clouds form called cumulonimbus

Extremely beautiful to watch and rains from these are fortuitous.

Clouds reflecting colours of red and orange brilliance up above

As we watch the magnificence of the setting sun.

Morning sunrise sometimes offers the more pastel hues

As the dark of night retreats and day ensues.

How fascinating is the dark night sky

Where nature embellishes her canvas with stars up high. 

As a changing lunar glows with luminous intensity every night

And a heavenly painting is always above and within our sight.

I thank the shining stars above for the masterpieces that all can see

An ever changing, wondrous rich palette of Natures Pure Intensity.


Milli 2008 cp


Written for the Challenge

Painters, Artist

Poetry Posse


Pin up of the day - The Pampas Grass

pampas

Original Size

It is now really getting into Autumn days in Switzerland. Temperatures are quite cold early in the morning, around 4-5° C, although during the day we get some sun and they rise to around 11-12° C if we are lucky. It is the time in the garden to start thinking about clearing up. One plant that makes its best show in Autumn are the various grasses and the pampas in particular. The ears of the pampas are at their best.

I bought this grass about eight years ago. Then it was just a few stalks and so it remained for a year. In the second year I got about five ears in Autumn and today this is the show it makes every Autumn. In March I usually cut it back to a third with the electric saw. The middle is now quite hollow so I usually fill it up a bit with chicken dung pellets and give it a shower. That seems to be all it needs through the year, although I water it fairly regularly. When I cut I usually make sure to go upwards so that it does not spread so much at the bottom. About end of August I see that some stalks get thicker and in September the show starts. I have a smallish area and this just stands in the middle of the lawn: a thankful show every year.

Thursday, September 25, 2008

Happy Birthday to Our Chief Guru: Keith.

Happy Birthday Keith and Have many special moments in the coming year.

Your note to us all says that you have gone fishing, so I am leaving one of the bonsai photos here from our last Adelaide Royal Show.

The Title is Gone Fishing.


May the Peas Be with You Always!

Our Garden Guru Founder, Keith.

yagottaalughehforpaljpg22-1.gif picture by millimum

Tuesday, September 23, 2008

Gone Fishing


Gone Fishing - I wish

I am not gonna be around for a little while - I am not really going fishing I just have too much on my plate, as they say, at the moment! I could be away for up to 10 days or perhaps a little longer but will try to look on in whats happening here and around the traps - just may not be able to make comments or make blogs or add photos etc etc that I so like to do - so for now my friends I will say goodbye and see ya soon

Keith

Pretty Wattles Are Now Showing Their Golden Colours for Spring.


The Golden Wattles are in flower now and such a beautiful treat they are on the eye.
Against the back drop of the Australian Native Bush the wattles come alive in their vibrant Golden Yellow. Their colours giving a ray of extra sunshine to any garden or in a natural setting they present a vista of gold amongst the different hues of green.
Image5.jpg (25K)
The Golden Wattle (Acacia pycnantha) is now the official floral emblem of Australia, wattle blossoms are to be found on the Australian Coat of Arms, and the Order of Australia is in the shape of a single wattle blossom.
The photo of the Australian coat of arms is courtesy of the site
A quote from the site above about why they chose this particular flower says:
"Australians may have made a home for themselves amongst the gumtrees, but it is the wattle tree that has found its way into Australian symbolism. Most Australians can recognise a wattle, at least when it is in flower. In the years leading up to Federation in 1901, the Australian Natives Association (ANA) began a campaign to find a national flower as an emblem for Australia like the rose for the English, the thistle for the Scots, leeks for the Welsh and the shamrock for the Irish. The Canadians had just recently chosen their maple. The wattle was the choice, the ANA committee said, as it was not excluded from any part of Australia, had bright beauty and was useful in tanning hides! The wattle was being called upon to represent an egalitarian, classless Australia of golden prosperity. Wow!"
An interesting choice and now you know why it was chosen.
A very pretty species and I am including some more photos from my
"wattle happy snaps collection"
Enjoy!
Wattles in the Bush.
Wattle Views.
Wattle and Hardenbergia.

Saturday, September 20, 2008

The Watchers of the Garden


Colours of the Year


Dont mix it up with Cannabis indica. Normally,i dont like Plants so much,that has to be protected in the Winter.
But this beautyfull Flower,i dont like to miss in my Garden.For many Months,they bring Colours into life

The Summer has passed and slowly is getting cold :(
I pass trough my Picture,of the Flowers,i have taken during the Summer,so,at least in my Mind,i can heath up a bit.
And when i see them, in front of my Eyes,then im sure,that there is no Painter equal like Nature.
I have a lot of pictures and i will start posting today and will add more,step by step

Wednesday, September 17, 2008

Spring Has Sprung in Australia: Photo of the Day.


Bringing some Spring to You all the way from Australia in the form of the:

 Beautiful Runnuculus Flower.

Runnuculus-1.jpg picture by millimum

Taken in the garden yesterday. There are only a few bulbs around but wow do they brighten the garden up.

Enjoy.

Cheers from Milli

Garden Gurus - Pin up of the day

Dahlia

Original Size

Our flower season is slowly going to an end in Switzerland, but the Dahlias decided to give a last burst of colour before they go to their sleeping quarters packed in earth in the cellar. In March they will awaken slowly but surely for another display of colour next year.

Tuesday, September 16, 2008

Some thoughts on snails

For those that live in countries with mild winters, I must explain that a garden in Switzerland usually makes a long sleep between October and February. During the winter we have temperatures beneath freezing, sometimes down to -15°C and there are few plants that live through these temperatures. The eggs laid by various insects remain beneath the earth’s surface waiting for a warmer sun to cause them to hatch.

I discovered some time ago that working on a computer can have its disadvantages. My shoulder was hurting and after a visit to the doctor I was given a computer ban for at least one week. I was not allowed to touch a computer. Not being able to go to work was one part of the problem, but my computer at home was also off limits, so how to pass time. It was Spring, my garden was just beginning to awaken after the Swiss Winter and I had a camera. As I was more or less housebound I started taking photos of my garden, but there were no flowers so I started discovering the insect world. Although many insects are a plague for the gardener, they all have their little purpose in their insect life. As I have three cats at home I avoid using poison in my garden as much as possible, meaning that my insects quite enjoy my garden from time to time, sometimes too much.

I have more than five hundred photos of insects, so here is part of the collection. I decided to dedicate this article to the snails.

In Switzerland there is no German word for slug; either you have a snail without a home, or one with a home. In the dry cold days there is usually no slug to be seen in any corner of the garden. As soon as the European April weather arrives with its rain and winds they seem to appear from nowhere; not just a few here and there, but an army arrives devouring any green leaf on its menu in no time.

Slug


So what do we do? There are many solutions to control the invaders. As some know, when the body of a slug comes into contact with salt, it dissolves. I just put myself in the position of a slug. If someone threw acid at me, I would dissolve as well and certainly would not enjoy it, so I decided I would not dissolve the slugs in my garden. Another method I heard about was a saucer filled with beer which attracts them. Sounds quite good, but I do not really want to feed my slugs on beer. So my solution is quite simple. If I see a slug sliming his way through the garden I just pick him up and throw him as far away as possible. I have a small garden so he usually lands on the surrounding lawns or in a neighbour’s garden. My distaste for handling slugs disappeared a long while ago. I can always wash my hands afterwards. It may seem that this is no good solution. I noticed once that a particular bush I had growing in the garden was not doing so well. Something was feeding on the leaves. One evening I went into the garden with a torchlight. The bush was covered in glistening white slugs.


Slug
 
It was then that I decided just picking them up and throwing them out of the garden was not the solution. I then bought something known as snail corns here. They are blue and you can sprinkle them on the ground around the plants: a good solution, the snails seem to dehydrate and the curse is put to one side. I noticed that slugs particularly are addicted to a plant we call tagetes, I think commonly known as marigolds. If the slugs had knives and forks they would bring them along as well. The literally feed on their leaves. These corns are dangerous for other animals, but I am glad to say that my cats have had enough sense not to eat them and these corns are the only cure for keeping the slugs away from these plants.
 

Marigolds
 
Now to the snails with the houses: where I leave at the foot of the first chain of the Jura mountains we mainly have the so called white banded snail. They come in all sizes and designs. I have spent many happy hours taking their photographs. Here are a few examples. They are everywhere. It is generally the idea in Switzerland that snails with houses do no great damage in the garden and I must agree that I have never seen that complete plants have been lost through this type of snail.


three snails
 
 
Banded Snail
 
 
Snail
 

There are of course edible snails. These are known as “Weinberg” snails. A larger size than the others and a delicacy. The area where I live is not particularly their home, but I found one in my garden this year and naturally took his photo.


Garden snail

Yes, I have eaten snails, but there is not really a lot of meat on them. We usually melt herb butter on them.

I am not an expert on snails, but find them a thankful subject for photos. I am open to any advice where I may have given them the wrong name. I am used to naming insects with the German name and bought myself an insect book in english to find out their correct name.

Garden Guru's - pin up of the day

Snap Pea Flower

Sunday, September 14, 2008

Kauri Trees New Zealand


Northland in New Zeland is home to the mighty Kauri Tree. I am not sure if this is fit for a gardening blog but perhaps someone has a Kauri in their garden. The Kauri is classed as one of the world's mightiest and ancient of trees. They can grow up to 50 metres tall. The timber is used for making furniture and souvenirs. Northland is still the home of great Kauri forests, they are a bit of a touristy thing now. Because of geographical isolation and pressure for the trees to be protected, they now are. The history behind them is fascinating.
This is the forest of the Waipoua, on the West Coast of Northland. There are walking tracks to see the notable Kauri, small Kauri are seen everywhere but it is the giants of the forest that people come to see.


Tane Mahuta - Lord of the Forest
In Maori Cosmology (Maori are the native people of New Zealand) Tane is the son of Ranginui, the Sky Father and Papatuanuku, the Earth Mother. Tane tore his parents apart breaking their primal embrace and this allowed space, air and light and this alowed life to flourish, and so Tane is a life giver. All living creatures are Tanes children. Tane Mahuta is the largest known living Kauri Tree and no one knows it's age but it is thought to have sprung from a seed from around 2000 years ago. It is 51.5 metres high and the girth is around 13 metres.

Te Matua Ngahere - the Father of the Forest.


It has a height of almost 30 metres and a girth of 16.4 metres.


At the begining of the ice age a vast area of the kauri forests became buried. Layers of forests were buried by some catastophic event.  There are many theories as to the cause of the buried forests, but no one knows for sure. Theories include, tsunami, a meteor hitting the land, earthquake.
Maori people had many uses for the tree like building canoes, tattooing, and they chewed the gum that came out of the tree. It is this gum that the tree became most valuable for. It was discovered that it made a great varnish and people came from all over to gather this 'gold"It was the Dalmation people that were the hardy gumdiggers and were the ones that stayed. A lot of their decendants are still in the Northland region.

Life on the gumfields was hard. Shelters were made of anything that was available, tin, wood, sacking. They were working long hours in wet conditions. Theyt would probe the ground looking for possible sources of gum then would dig large holes to find it. Many of these holes still are around today and it is the remenants that are found in the holes that scientists are now studying to find out the history and ecology of the buried forests.
.


Thursday, September 11, 2008

Photo for today

Bok Choy - in flower

Ruby Chard Silver beet


IMG_2181-1-1.jpg picture by millimum

We actually only have a small patch for growing vegetables at the moment and one crop I love to plant wherever I can find a sunny space is silver beet.

I was at the local garden wholesalers and noticed this lovely green silver beet with the most vibrant red stalks. Hence the name Ruby Chard. The nurseryman told me that it was a cross between silver beet and rhubarb. Anyway to cut a  long story short I decided to give it a go. Oh and by the way Winter Spinach is another wonderful crop to grow if you can get it.

The Ruby Chard as my silver beet turned out to be, struggled along before our much needed rains came. We had a terrible summer of water restrictions and drought earlier in this year and everything either struggled along or died. Taking note of Keith's mulching methods I am.

The Silver beet came into its own accompanied by the tyres full of potato plants the small tomato plant on the sunny fence which has made it through winter and is setting fruit now even as I type. Also in the garden are onions and beetroot oh and I must not forget the parsley. So the little patch is doing well.


IMG_2179.jpg sunny fence picture by millimum

Getting back to the Silver beet I have included a recipe for a tart here and because when I cook, I cook, off the cuff, so to speak from experience, not from exact quantities. I have copied the recipe from the net. Believe me when I say this Silver beet is a treat and teams up especially well with eggs or even with garlic and onion as a pureed soup. Go ahead give it a go and reap the rewards.

Degree of difficulty:
Medium
You need:

1 pre-baked 26-28cm pastry tart shell, in its tin

Filling:

30g unsalted butter

Pale parts of 5 medium size shallots (green onions), finely sliced

650-700g ruby chard or silver beet

4 free-range eggs

1¼ cups milk

½ cup cream

Sea salt, to taste

Freshly ground black pepper, to taste

¼ teaspoon nutmeg

100g mozzarella, grated

Method:

Preheat oven to 180C. Sit the tart shell in its tin on a baking tray and set it aside.

Melt the butter in a very large frying pan over medium/low heat. Add the shallots/green onions and cook them, stirring regularly, for 5 minutes.

Meanwhile, thoroughly wash the chard, shake off excess water, and slice it (including the stalks) finely. Add it to the frying pan and cook, stirring occasionally, for 5 minutes or so until it's wilted but the leaves are still deep green. (If there is liquid in the base of the pan, briefly increase the heat to boil it off.) Turn off the heat. Set aside.

Whisk the eggs to break them up, then whisk in the milk, cream, and a little salt, pepper and nutmeg to taste. (Check how salty the cheese is before you salt the mixture, as you may not need any extra.)

Spread the chard mixture evenly over the base of the tart shell. Sprinkle the grated cheeses evenly over this. Give the egg mixture another quick whisk in case it's settled a bit and drizzle it over the cheese. Scatter the almonds on top.

Bake the tart for 35-40 minutes, or until it's deep golden and lightly set. To check, insert the tip of a fine knife into the middle and gently press the sides of the cut apart. The filling should be softly set with no liquid running into the cut. Remove it from the oven and leave it to cool and settle for at least 10 minutes before serving. Then just slip off the outer ring of the tin, and gently slide the tart onto a serving plate.

IMG_2009-1.jpg picture by millimum

Recipe courtesy of click here.

Enjoy!!

Cheers from Milli.

Tuesday, September 9, 2008

Food for Thought-Garden Guru Salute!

                               Photo by Mia

Hey all Garden Gurus,

In a comment here I wrote  "Guru Salute to all" and then Keith asked what a Guru Salute would be, so I thought maybe we could have a fun discussion and perhaps a poll about it??? lol

So, if everybody who wants to take part put their suggestions in the comment box here, we could maybe do a Poll for it in another blog lol?

I will start out with two suggestions:  MAY THE FORK BE WITH YOU!
   and  PEAS ON EARTH!

Let's have fun with this says 

Garden Guru Gnome Mia

Thursday, September 4, 2008

The Future - arriving at the past. .2.. Sowing carrots and other root crops

This blog is really about a method my Father taught me about sowing carrots Every time I sow this way he is there with me in my thoughts and heart so in a sense he lives on in every crop I sow. This blog then is really from him to you. My part has been to take a little time to take photos to illustrate the steps and of course write what he taught me. So enjoy the fruits of his experience.


Carrots are an easy crop to grow. In the colder regions they are sown from early spring until early summer, in succession. Where I live I can grow them all year round and so, I sow a few meters of seeds every two months in succession to enjoy a continual supply throughout the year. I think it always worth pushing the boundaries too when you plant – what does it matter if you lose a crop to frost when you find out for sure where your boundaries are with when to sow.

 
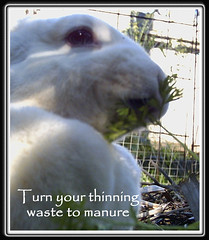
For my winter soups I also grow parsnips and use this same method of sowing. With root crops such as these the looser the soil the better although they will grow successfully in clay soils. Looser and sandier soils mean the tap root can reach deep into the soil looking for moisture creating good long fleshy carrots. This means that drainage is good so that the roots will not rot in excessive moisture in areas of prolonged rain periods. The drawback of loose soil is leaching of nutrients, but with carrots their tap root reaches deep into the soil. Also, remember that the nutrients are brought back to the surface and stored in their foliage so composting or leaving them to rot on the surface when you harvest them will re-cycle these stored nutrients to the surface again. I personally feed the tops to the rabbits and recycle them this way.


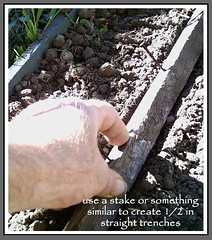
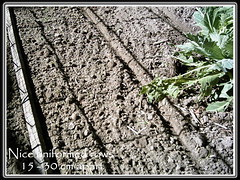
First of all it is worth digging the soil to spade depth and a bit more and remove any stones or other objects that will impede growth, causing forked or miss-shaped roots. This includes fresh manures. You need now make 1 cm or 1/2 inch deep trenches in the soil surface using tomato stakes or something similar in rows about 6 – 12 inch or  15 - 30cm apart, depending on the variety.


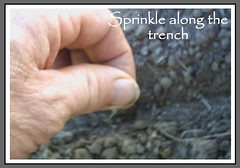
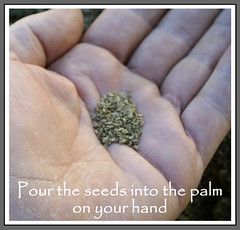
Pour the seed into the palm of your hand and then, pinching some of the seeds between your fore-finger and thumb, sprinkle the seeds lightly along the rows. Please note here that some gardeners mix sand with the seeds to ensure they are sown thinly. Some mix other seeds like radishes together with the carrot seeds so that, as the carrots develop, they can be feasting on the fast growing radishes while creating a more natural, and easier, method of thinning that the carrots unfortunately require. Unfortunate because thinning can be a bit time consuming, but well worth the effort. Once sown cover the seeds (1cm, 1/2 in) and firm the soil with the hand. Another practice I often employ is to grow fast growing crops between the rows such as lettuces radishes, bok choy ..etc and harvest when ready or overgrown by the root crops foliage.


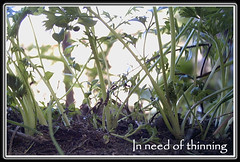
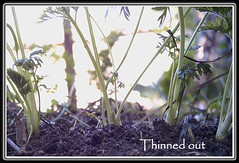
Seedlings emerge in 7 – 10 days and once about 1 – 2 inches high, or when you intuitively feel it is time to do the first thinning, grab some scissors and thin away. You will notice in the photos that the seedlings can grow close to each other and need to be thinned so the roots can grow without being impeded by other seedlings growing too close. To pull the seedlings out, at this stage, will damage the stronger seedling that you choose to leave growing in the soil - so I suggest you use scissors as per the photo. Note here too you must get rid of any weeds that sprout around your seedlings so they do not interfere with their growth or fight for sun and nutrients. I thin out over at least three stages. Your intuition will tell you how far apart to thin the seedlings and which are the healthier to leave to grow. The first times you will make mistakes but after a few successive crops you will be an expert – no doubt!!!


The second, third, fourth and fifth thinning, which I warn can be a pain in the back and requires much patence (if you are like the impatient me), will be your first harvest for the table salad. The slender slightly fleshy roots can be added to the salad for a little extra taste and colour and the rabbits love any fresh seedling tops you can feed them. They in turn, gladly, leave deposits of recycled garden waste for you to collect and introduce to the garden as manure.  Also remember each thinning produce larger roots and eventually you can add them to the pot.


Note too the baby carrots are ready after 10 weeks so carrots are, in this light, perfect to grow for the table. Growing them in succession every 8 – 10 weeks in rows of about 3m or 3 yards is about right but after a few crops you will figure what is the right amount to grow each time and how often to suit your personal needs.


Other things to think about are things like light mulches, to keep weeds down that can impair the shape and growth of the root. They too use the nutrients and water. Do not over water otherwise the roots can get lazy and not lengthen to produce long carrots but on the other hand – remember that in the hotter months, that lack of water will dry out the root and they do not taste as nice. Rotation of crops is important – never grow carrots or any plant for that matter in the same spots in successive crops – this I will cover in another blog – so please trust me for now (wink). There are other localised problems to do with carrot flies and such so I advise you source books from the library or talk with other gardeners in your street. Once you start to garden you will find there are many others who not only enjoy gardening but readily share experiences and seeds.


Another great use for the foliage is to use it as a green backdrop in flower arrangements in the home or my favourite is to use as a garnish to improve the look of your family meals. It not only looks great but makes it taste better because of the joy of seeing such beauty on the plate – tastes come from the mind as much as the taste buds – believe me!


So before I finish I want to give you links to two other great blogs on gardening that my online friends Jeremy and Amy have produced. I am thinking here to perhaps start a group blog on gardening so we can share and grow together healthy gardens, bodies, minds and spirits let me know what you think.

Please look below to the links to the other sites on gardening as metioned above


this is the link to Amy's site http://amyukalichick.multiply.com/journal/item/98/Let_the_birds_and_insects_do_it.


and Jeremy's - http://sotuis.multiply.com/journal/item/74
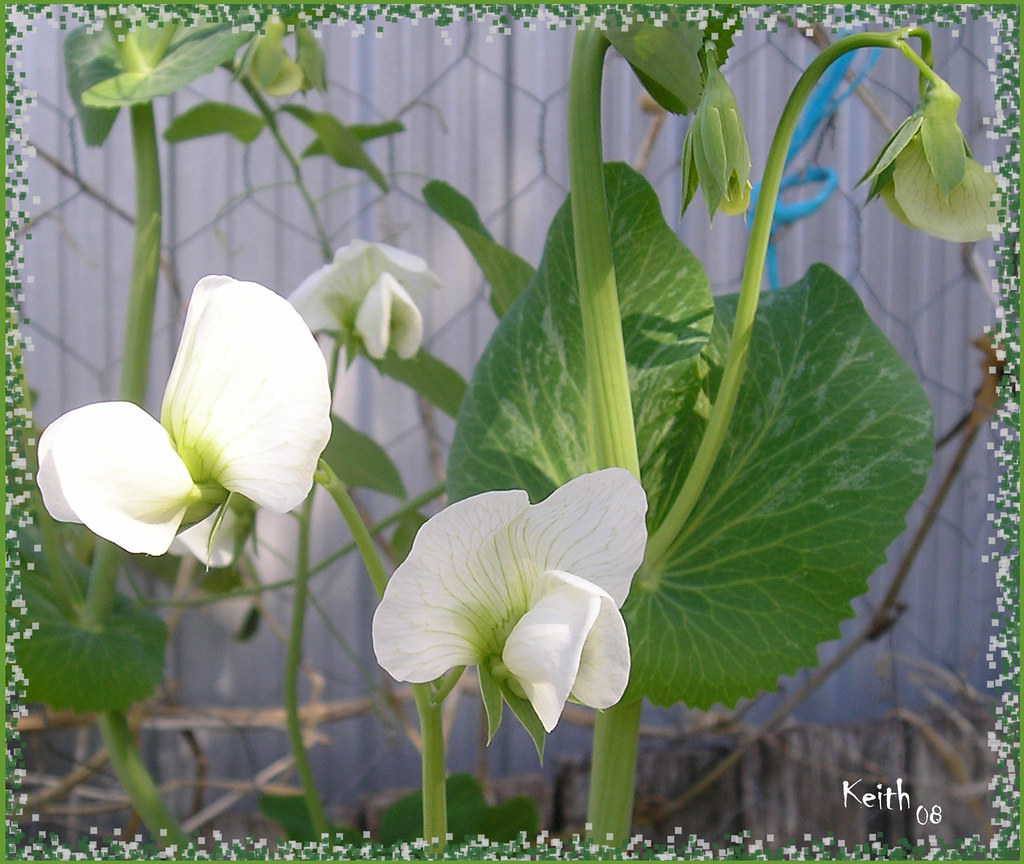