We actually only have a small patch for growing vegetables at the moment and one crop I love to plant wherever I can find a sunny space is silver beet.
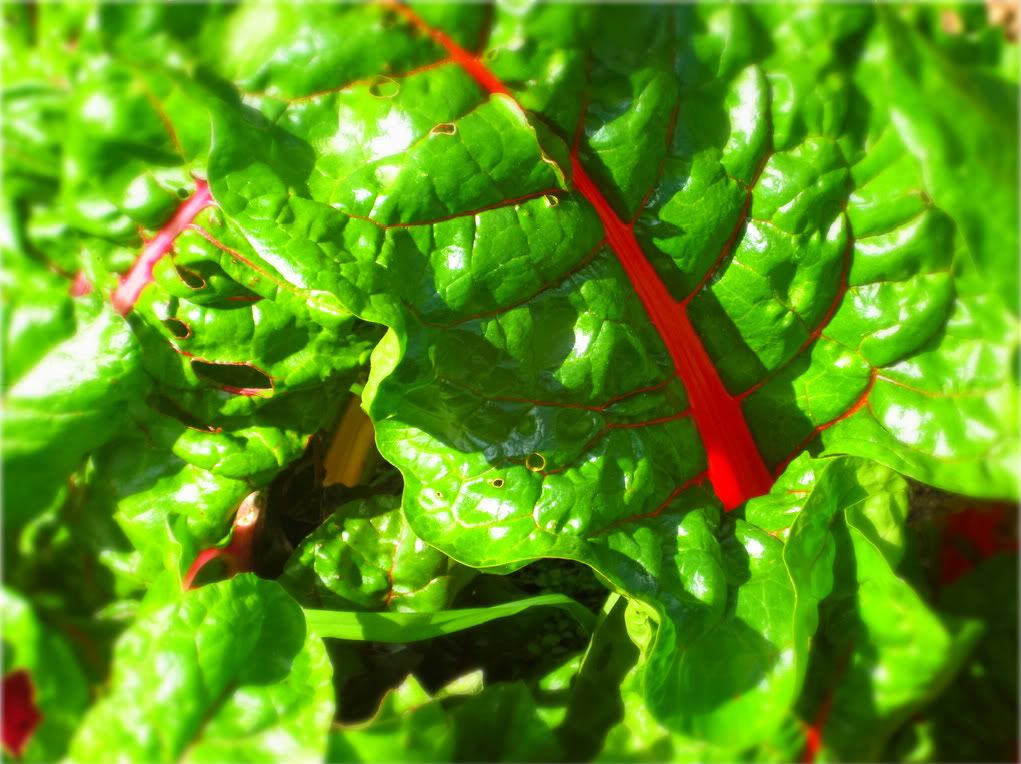
I was at the local garden wholesalers and noticed this lovely green silver beet with the most vibrant red stalks. Hence the name Ruby Chard. The nurseryman told me that it was a cross between silver beet and rhubarb. Anyway to cut a long story short I decided to give it a go. Oh and by the way Winter Spinach is another wonderful crop to grow if you can get it.
The Ruby Chard as my silver beet turned out to be, struggled along before our much needed rains came. We had a terrible summer of water restrictions and drought earlier in this year and everything either struggled along or died. Taking note of Keith's mulching methods I am.
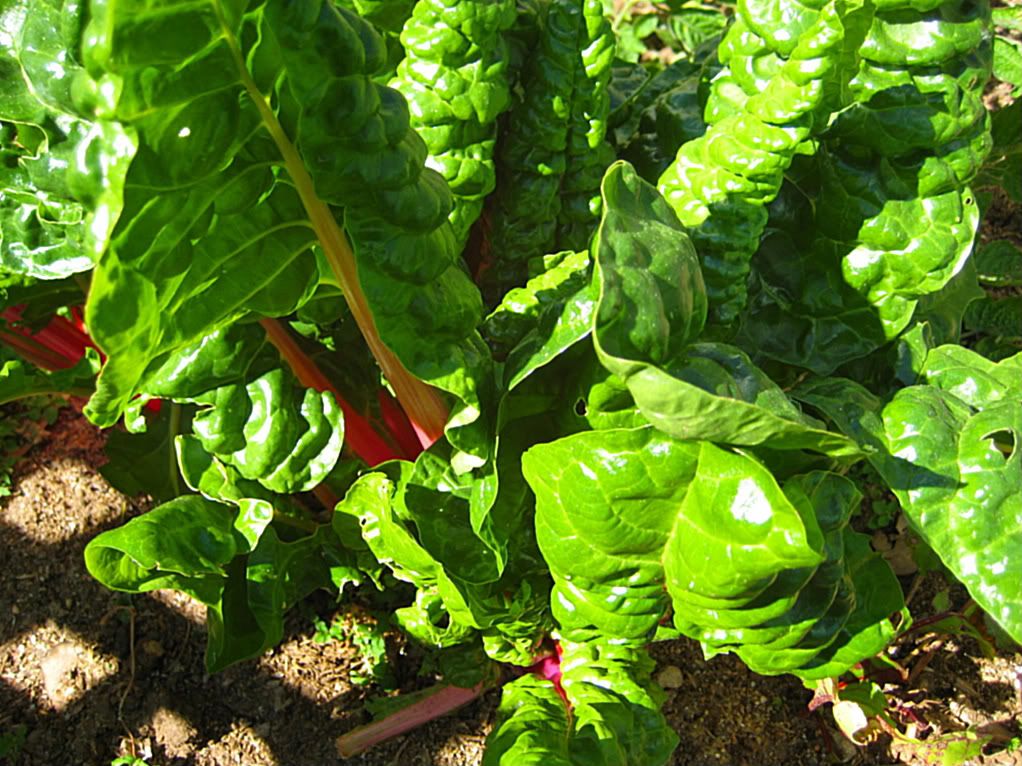
The Silver beet came into its own accompanied by the tyres full of potato plants the small tomato plant on the sunny fence which has made it through winter and is setting fruit now even as I type. Also in the garden are onions and beetroot oh and I must not forget the parsley. So the little patch is doing well.

Getting back to the Silver beet I have included a recipe for a tart here and because when I cook, I cook, off the cuff, so to speak from experience, not from exact quantities. I have copied the recipe from the net. Believe me when I say this Silver beet is a treat and teams up especially well with eggs or even with garlic and onion as a pureed soup. Go ahead give it a go and reap the rewards.
1 pre-baked 26-28cm pastry tart shell, in its tin
Filling:
30g unsalted butter
Pale parts of 5 medium size shallots (green onions), finely sliced
650-700g ruby chard or silver beet
4 free-range eggs
1¼ cups milk
½ cup cream
Sea salt, to taste
Freshly ground black pepper, to taste
¼ teaspoon nutmeg
100g mozzarella, grated
Preheat oven to 180C. Sit the tart shell in its tin on a baking tray and set it aside.
Melt the butter in a very large frying pan over medium/low heat. Add the shallots/green onions and cook them, stirring regularly, for 5 minutes.
Meanwhile, thoroughly wash the chard, shake off excess water, and slice it (including the stalks) finely. Add it to the frying pan and cook, stirring occasionally, for 5 minutes or so until it's wilted but the leaves are still deep green. (If there is liquid in the base of the pan, briefly increase the heat to boil it off.) Turn off the heat. Set aside.
Whisk the eggs to break them up, then whisk in the milk, cream, and a little salt, pepper and nutmeg to taste. (Check how salty the cheese is before you salt the mixture, as you may not need any extra.)
Spread the chard mixture evenly over the base of the tart shell. Sprinkle the grated cheeses evenly over this. Give the egg mixture another quick whisk in case it's settled a bit and drizzle it over the cheese. Scatter the almonds on top.
Bake the tart for 35-40 minutes, or until it's deep golden and lightly set. To check, insert the tip of a fine knife into the middle and gently press the sides of the cut apart. The filling should be softly set with no liquid running into the cut. Remove it from the oven and leave it to cool and settle for at least 10 minutes before serving. Then just slip off the outer ring of the tin, and gently slide the tart onto a serving plate.
Recipe courtesy of click here.
Enjoy!!
Cheers from Milli.
In Switzerland this is grown very much, but more the type with white stalks, although the red also. I used to grow it from seed. In Switzerland the leaves are eaten but not so often. We have the vegetable for the stalks. The leaves are removed from the stalks, the stalks are cut into pieces and boiled in water for about 5-10 minutes until they are soft enough to bite. We then make a white sauce and serve them as a vegetable in the white sauce. You don't see so much of the red chard, I think it is more for decorative, although I grew these as well and used to mix them with the white stalks when I cooked them. We call it "Krautstiele".
ReplyDeleteThanks Pat for your information here. Yes I have heard of Swiss chard and I think it is similar or the same as we call silver beet.
ReplyDeleteYou can eat all of the plant and the benefits are wonderful for you in dietary fibre as well as Vitamins A, C, E and K, riboflavin and B6, as well as minerals such as copper, iron, magnesium and zinc (according to where it is grown) Ideal for dieters, Also it contains no saturated fat or cholesterol, it does contain sodium.
So what a wonderful and easy plant to have in any garden.
wow you do well with your tomatoes over winter - like you I just let my tomatoes ramble rather than cultivate by removing the laterals etc and harvest pretty much all year round. I would have thought it too cold down there for wintering over such things. As for the ruby chard - great blog and recippee plus I like the nice up close photo - beautiful - I stick to the silver beet as has always been a favourite for the table - I usually make something like a satay sauce (peanut sauce spiced up) and roll the silver beet through it to coat the leaves - for those who hate silver beet or spinach this is one they will eat - unless they hate peanuts haaha - Thanks Milli for the blog - great fun and thinking about the recippee!
ReplyDeleteThanks MIlli for the wonderful photos and telling us about your garden. I have never been a great fan of silver beet (maybe we just had it too often for a while) but I feel like giving it another go after your tasty looking description and pictures. How interesting that only the stalks are eaten in Switzerland Pat.
ReplyDeleteThe recipe sounds tasty... The stems are so brilliantly colored, I wonder if they could be
ReplyDeleteused for natural fabric dyes?
Hi Keith well it is cold and maybe it is just the hardiness of these dear little tomatoes that made them stay for winter. The sunny fence helped them along as well. Yes I let them ramble. I love the idea that you have shared about your satay silver beet sounds yummy great idea there.
ReplyDeleteI really have no idea about the dying aspect from the stems naturespirit however it is worth a thought or a try next time you are dying something. I think the standards are the best ie brown onion skins coffee beetroot Etc. Thanks for your interest.
ReplyDeleteGreat photos! That top one especially :-)
ReplyDeleteI think you can make wine out of silverbeet! Great blog. Silverbeet is reallyt handy to have in the garden, so easy to grow and you can use it to feed horses a lil treat
ReplyDelete